Install Atom.
If you want to be a proper web developer, then you should be using a proper text editor - not Notepad and not TextEdit.
Atom is a “hackable” text editor for the 21st Century, and it is the text editor of choice not only for us, but for many computer programmers all over the world.
Let’s check if you have Atom already installed on your computer.
For Windows:
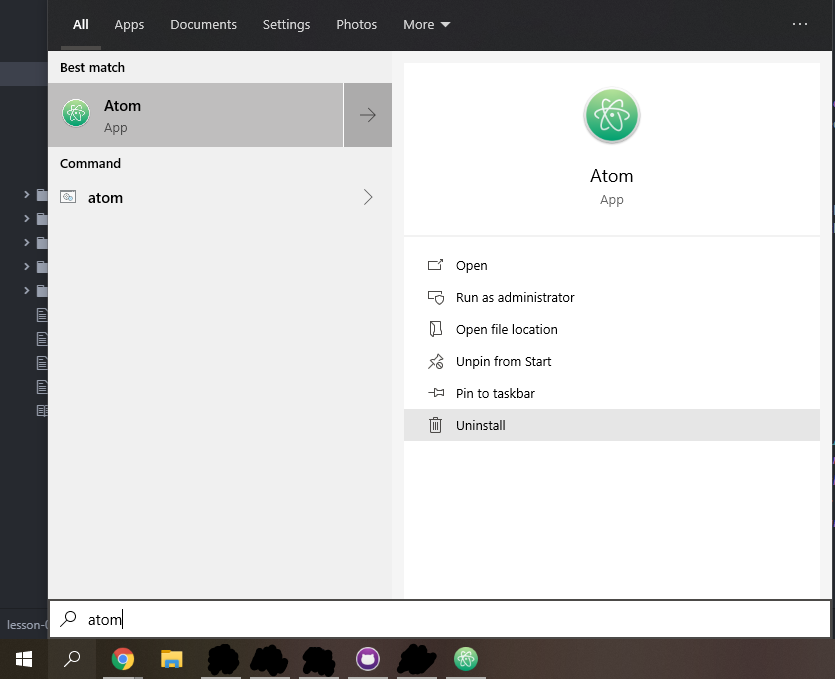
- Click the search button in the bottom-left of the menu bar.
- Enter “Atom”.
- If you have Atom installed, then you should be able to see a green atom icon. That’s Atom!
- If you do not have Atom installed, then you should not be able to find this green atom icon. From here, you will have to download it using the link below.
For Mac:
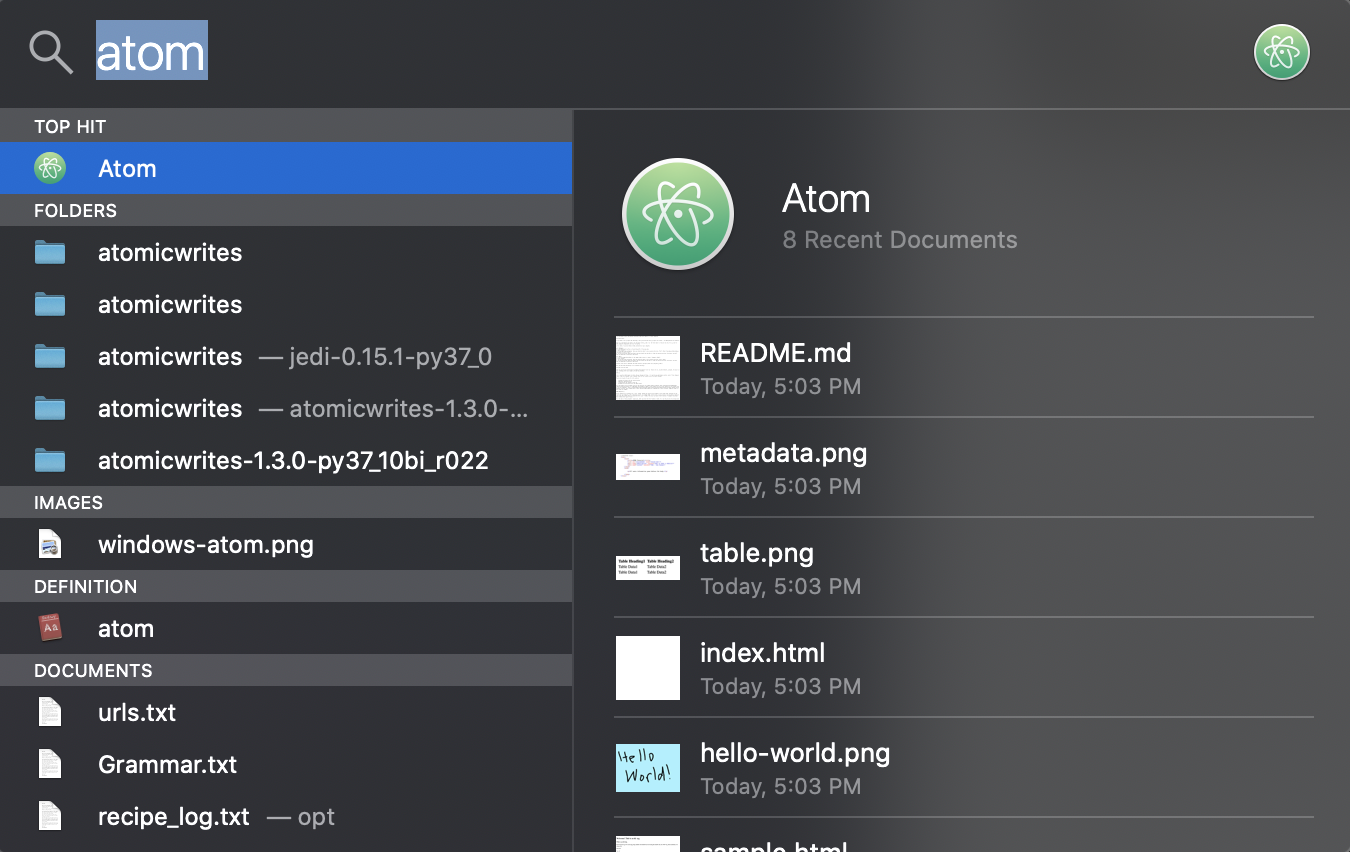
- Click the magnifying glass in the upper-right corner, or press
Command + SPACE. - Enter “Atom”.
- If you have Atom installed, then you should be able to see a green atom icon. That’s Atom!
- If you do not have Atom installed, then you should not be able to find this green atom icon. From here, you will have to download it using the link below.
Please click here to download the Atom installer.
Once we have Atom installed, let’s continue learning!
Recap from last time
Some of you may be confused after speeding through the first two lessons of our build-a-website program. To assist in your learning, here is a summary of what you learned:
Git
Git is a system that keeps a history of any changes to files - it can help you determine exactly what files changed, when they were changed, who changed them, and the reasons why they were changed.
There are a bunch of uses for Git, such as:
- Viewing the history of the entire project
- Adding or modifying files
- Creating your own branch to work on
- Merging your own branch into the main branch
For the purpose of our program, you will be using Git to commit (or highlight) any changes we make to your website to your local repository (the folder that is on your computer), then to push those changes from your local respository to your remote GitHub repository (copying your files from your computer folder to the folder on GitHub)
Repository
A Git repository is actually the .git/ folder inside your project area (which is the folder that contains all the files for your website). This repository tracks all changes made to the files in your project, thus building a history over time. This means that if you delete the .git/ folder, then you lose your entire history of changes (so please don’t delete the .git/ file).
For the sake of this program’s simplicity, when you hear the term “commit”, think of it as the process of writing down your current file changes to a growing list of file changes - this growing list is your Git repository, thus you “commit” your current files into the repository. Likewise, when you hear the term “push”, think of it as copying your current files and its change history to your online GitHub folder, thus you would “push” everything in your .git/ folder to your online GitHub repository.
You might also hear the term “fetch” which means to download commits, files, and refs from a remote (or online) repository into your local repository (the folder on your computer). You will probably only use this command if you end up switching computers from your previous computer, and you need to download your website files to this new computer.
GitHub
Github is a website that helps us developers store and manage our code. Google search results can give us more insight into what Github is. Some features that Github provide for developers make it really easy for us to do pretty cool things, like using Git commands without knowing any command line interface or have our own website hosted online for free!
For this purpose of this program, GitHub will be holding your online repository in which you push your project changes to.
GitHub Desktop
GitHub Desktop makes it easy for us to do many of the common Git command with the click of a few buttons! For most of this program, you will be using GitHub Desktop to commit and push your website changes to your online GitHub repository!
GitHub Pages
GitHub has a really awesome feature where you can host your own website FOR FREE! All you need to do is create a repository named [your username here].github.io and it’ll automatically host your website at [your username].github.io. It is pretty nifty, and it doesn’t cost a dime!
You will be hosting your website using GitHub Pages, and this webpage is automatically set-up through the repository name ([your username here].github.io)!
index.html
The index.html page is the most common name used for the default page shown on your website if no other page is specified when a visitor visits your website. In other words, index.html is the name used for the homepage of your website.
Last time, we made you create and edit an index.html file that is placed into your [username].github.io repository (both local and online). For the start of this program, if you want to make any changes to your preliminary website, then you will make those respective changes to the index.html file.
HTML
Hopefully you have an idea of what is going on so far with this program. Hence, to start the foundation of your website, we will be teaching you how to learn and use HTML!
What is HTML?
HTML stands for Hypertext Markup Language. HTML describes the basic structure of a web page semantically. In other words, it conveys how to render the graphics of a web page to the browser. For this lesson, the browser will read your code inside the index.html, and your browser will begin to have a basic structure to it!

Learning HTML is the first step in creating websites, combined with JavaScript and CSS you will be able to create aesthetically pleasing and functional websites. JavaScript and CSS is something that can be learned at another time. For now, let’s focus on how to add basic content on a page, like text and images!
HTML: Basics
Anatomy
Every HTML element is comprised of:
- Opening tag: the first HTML tag that contains the element name, surrounded by ` < ` and ` > `.
- Content: the information contained betwen the opening and closing tags.
- Closing tag: the second HTML tag that contains the element name, surrounded by ` </ ` and
>.

Essential HTML Elements
-
<p>Hello World!</p>
pstands for “paragraph” and will be your bread and butter element. The example paragraph element above will be read by the browser as a paragraph element, thus the “Hello World!” text will be displayed in a paragraph. -
<h_>Heading</h_>
h_is a heading element, replace_with a number between 1 and 7 to choose the size of the heading, being that 1 is the largest and 7 is the smallest. For example, writing<h1>Topic</h1>in yourindex.htmlfile will display a huge text saying Topic. -
<a href=”/”>Link</a>
astands for “anchor”, and it is used to redirect the user to another location in the same or other web pages. “href” is how you reference the redirect of the user in which you can put a local path here or perhaps an entire web URL. For example, writing<a href="https://www.google.com/">Click me for help!</a>in yourindex.htmlfile will display a clickable text saying “Click me for help!” that when someone clicks on that that text, it will change the current webpage to Google’s homepage.
PRE-CHALLENGE #01: Do you have an index.html?
We mentioned an index.html file earlier - but do you actually know if you have that file for your website?
Let’s go ahead and search for our index.html file.
For Windows:
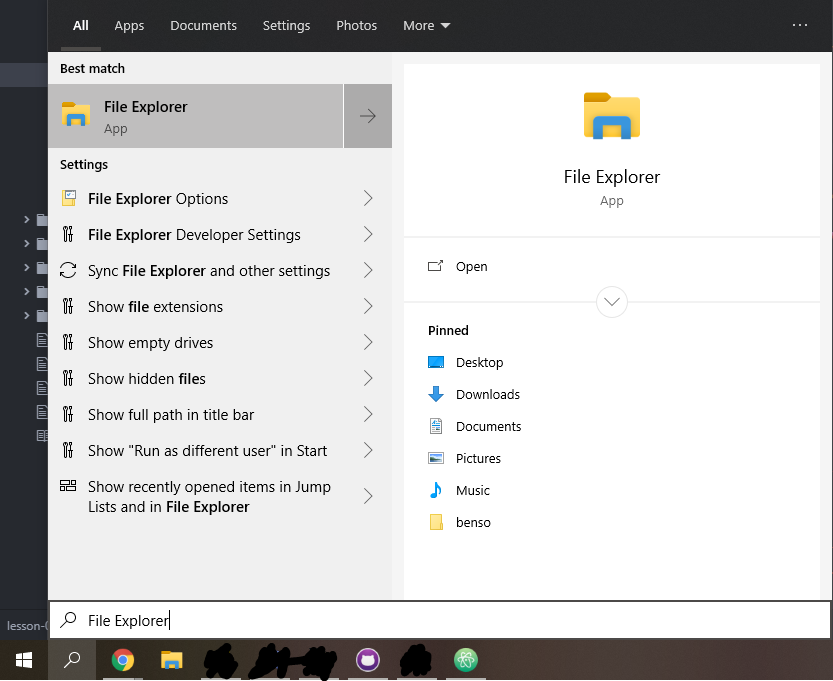
- Click the search button in the bottom-left of the menu bar.
- Enter “File Explorer”, then click it.
- Click on
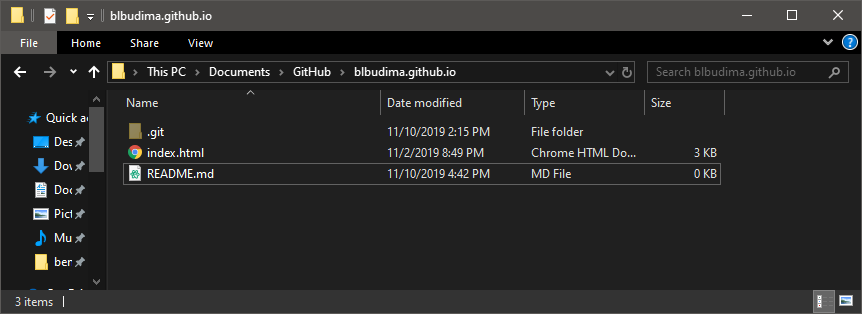
Documents -> GitHub -> [username].github.io. This should lead you to your website folder. Inside the folder, you might have aREADME.md, anindex.html, or perhaps nothing at all. If you DO have anindex.html, then you are set! Otherwise, if you DO NOT have anindex.html, then go to step 4. For example, my folder looks like this: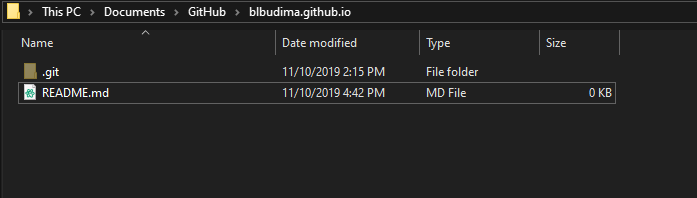 Since I do not have an
 index.html, I will need to add it. - To add an
index.htmlfile to your folder, please right-click the link here and selectSave as.... - Go ahead and save the
index.htmlfile to location of your website folder (e.g.Documents -> GitHub -> [username].github.io).
- Your website folder should look like this now:
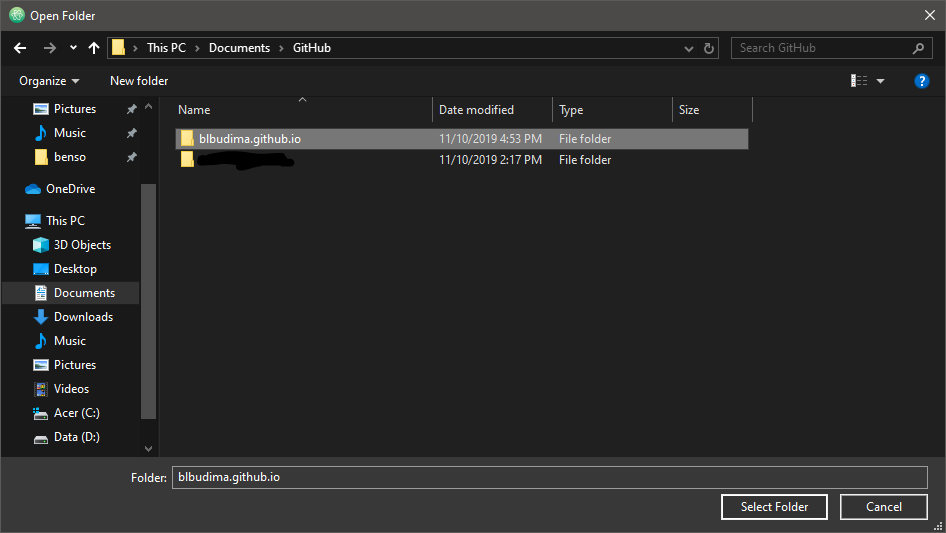
- Go ahead and open this website folder in Atom by opening up Atom, click
File -> Add Project Folder..., then navigate to your project folder (e.g.Documents -> GitHub -> [username].github.io)
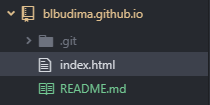
- You should see your project folder on the left column of your Atom! Double-click your
index.htmlto edit it!
For Mac:
-
- Click the magnifying glass in the upper-right corner, or press
Command + SPACE.
- Click the magnifying glass in the upper-right corner, or press
- Enter “Finder”, then click it.
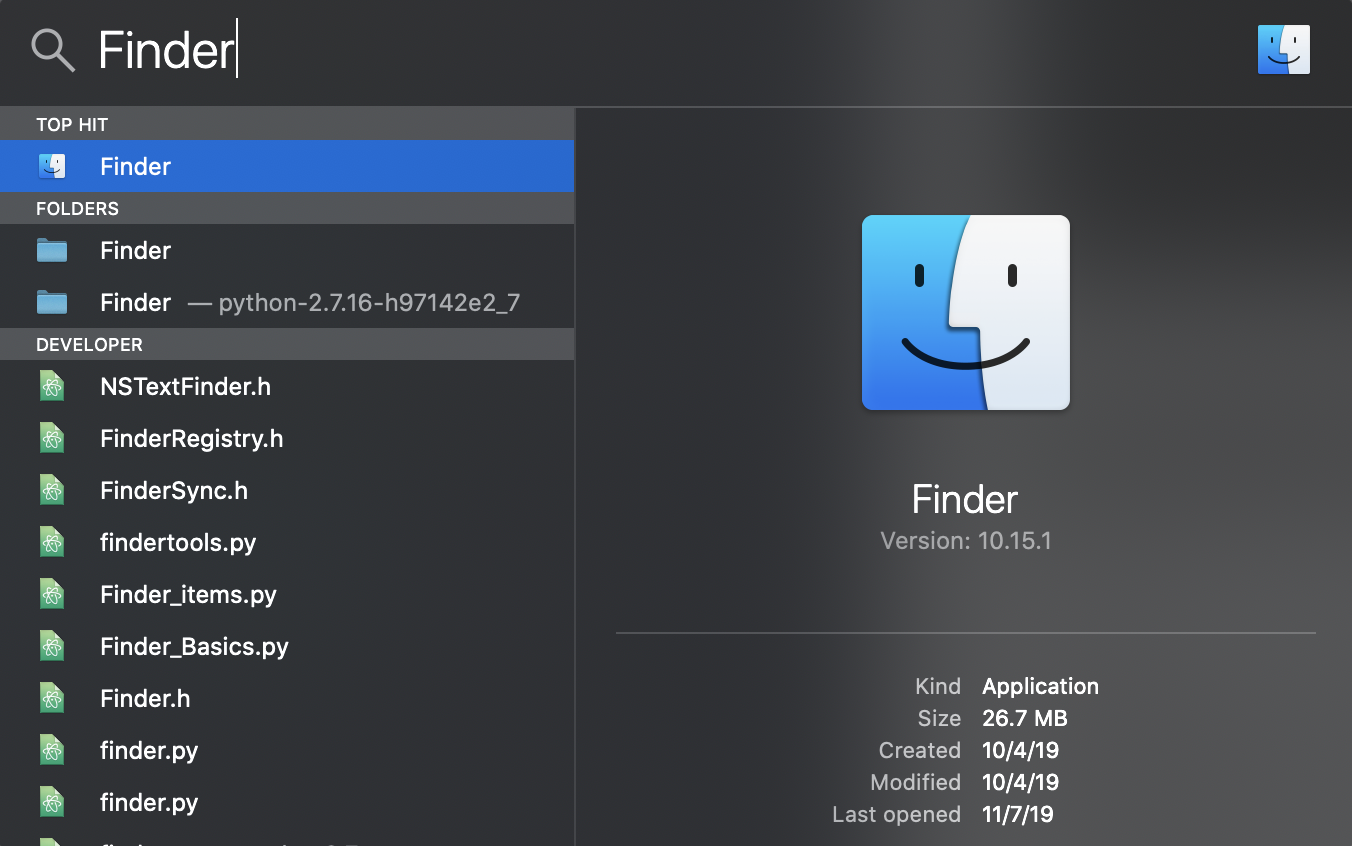
- Click on
Documents -> GitHub -> [username].github.io. This should lead you to your website folder. Inside the folder, you might have aREADME.md, anindex.html, or perhaps nothing at all. If you DO have anindex.html, then you are set! Otherwise, if you DO NOT have anindex.html, then go to step 4. For example, my folder looks like this:
Since I do not have an index.html, I will need to add it. - To add an
index.htmlfile to your folder, please right-click the link here and selectSave as.... - Go ahead and save the
index.htmlfile to location of your website folder (e.g.Documents -> GitHub -> [username].github.io). - Your website folder should look like this now:
- Go ahead and open this website folder in Atom by opening up Atom, click
File -> Add Project Folder..., then navigate to your project folder (e.g.Documents -> GitHub -> [username].github.io)
- You should see your project folder on the left column of your Atom! Double-click your
index.htmlto edit it!
CHALLENGE #01: The beginnings!
Let’s try adding these three HTML elements to your website! Go ahead and clear our your index.html file, then edit your index.html file so that you insert these items:
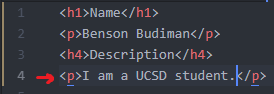
- a large heading element that says “Name”
- a paragraph element that says your name
- a smaller heading element that says “Description”
- a paragraph element that contains a short description about you
- an anchor element saying “Click me!” that redirects the user to your GitHub profile
Here are some hints to remember:
index.htmlcan be located on your computer in yourDocuments/GitHub/[username].github.io/ folder.- Once you make your changes, don’t forget to SAVE your
index.htmlfile. This can be done by clickingFile->Saveor by pressingCTRL + Sfor Windows orCommand + Sfor Mac at the same time. - In order to check your changes, open up your GitHub Desktop (the app with the purple background), click
Commit to masteron the bottom-left, then clickPush originon the top bar. Afterwards, open up a web browser and put in your website (e.g[username].github.io) in the URL, and it should load! - Don’t forget to use Google to your advantage!
Here are some steps to get you started:
- Once you open up your
index.html, let’s go ahead and place a large heading element for our name. We will use<h1>as our heading size.
- Since this large heading element will say “Name”, we will put “Name” in between the
<h1>.
- Next, we will have a paragraph that will say our name. The paragraph element is
<p>. For example, my name is Benson Budiman, so I will put “Benson Budiman”.
- Let’s go ahead and place a smaller heading element that says “Description”. We will use
<h4>as our heading size.
- Next, we will have a paragraph that will say a short description about me. The paragraph element is
<p>. For example, I am a UCSD student, so I will put that “I am a UCSD student.”
- Finally, we will have an anchor element that says “Click me!” that redirects the user to my GitHub profile. Make sure to replace the link with your own profile link!
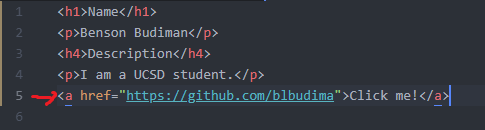
Here is an example of a small website that includes these three HTML elements:

More Essential HTML Elements
-
<button>Click Me!</button>
As the name suggests, this element creates a clickable button. The example above will display a button that says “Click Me!” within it. -
<img src=”blank”/>
imgstands for “image”. This element is used to embed (or place) images in the webpage. You can replaceblankwith the link to the image you want to display. IMPORTANT: Note how this element comprises of only one tag (there is no</img>at the end of the line). The image tag is part of a family of HTML tag exceptions that only require one tag. This is called a self-closing tag as we can simply close out a beginning tag by using the “/” character. For example, typing<img src="https://images.pexels.com/photos/104827/cat-pet-animal-domestic-104827.jpeg?auto=compress&cs=tinysrgb&dpr=1&w=500"/>will display a picture of a cat on your webpage! -
<br/>
brstands for “line break”. This element adds a new line after the previous element. It’s functionality is similar to the “Enter” key on the keyboard. You can use this element to create larger white-spaces between text or images in your webpage. -
<div> … </div>
divstands for “division” (or section) in an HTML document. Thedivelement is often used as a container to hold other HTML elements to style them with CSS or to perform certain tasks with JavaScript. For this lesson,divis not as important, but you should not forget about it - it will come back! -
<span> … </span>
spancan be used to style certain elements within its tags. For example, typing<p>This is <span style="color:blue">blue</span>.</p>will display the following: For this lesson,
 spanis not as important because we will not cover any styling features, but you should not forget about it as well! It will come back next lesson.
CHALLENGE #02: Let’s add a little more!
Let’s try adding more three HTML elements to your website! Go ahead and edit your index.html file so that you insert these items to the bottom of what you currently have:
- a button that says “Click me!”
- an image of a dog
- an image of a cat
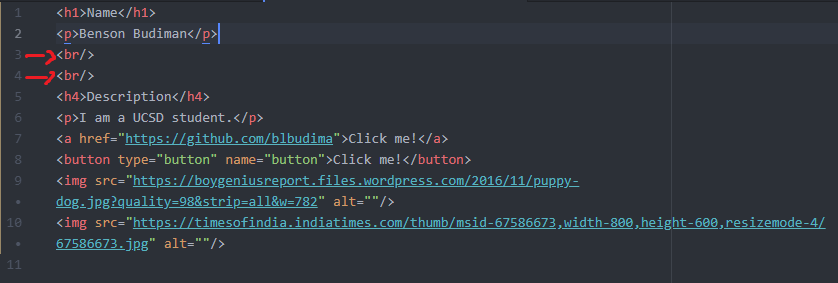
- two line breaks between the paragraph element of your name and the heading element of “Description”
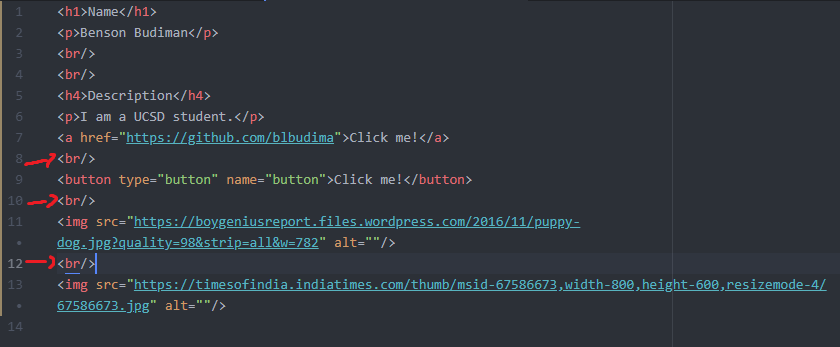
- one line break between the anchor element and the button element
- one line break between the button element and the image element of a dog
- one line break between the image element of a dog and the image element of a cat
Here are some hints to remember:
index.htmlcan be located on your computer in yourDocuments/GitHub/[username].github.io/folder.- Once you make your changes, don’t forget to SAVE your
index.htmlfile. This can be done by clickingFile->Saveor by pressingCTRL + Sfor Windows orCommand + Sfor Mac at the same time. - In order to check your changes, open up your GitHub Desktop (the app with the purple background), click
Commit to masteron the bottom-left, then clickPush originon the top bar. Afterwards, open up a web browser and put in your website (e.g[username].github.io) in the URL, and it should load! - Don’t forget to use Google to your advantage!
Here are some steps to get you started:
- Once you open up your
index.html, let’s go ahead and place that button that says “Click me!”.
- Let’s place an image of a dog! Here is an image of a dog that you can use. Go ahead and click
Here, and then use its URL link for your dog image!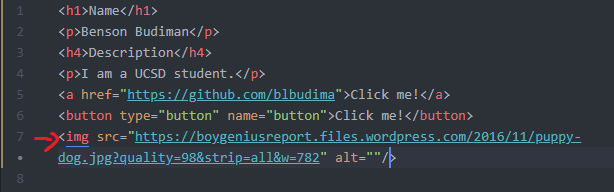
- Let’s place an image of a cat! Here is an image of a cat that you can use. Go ahead and click
Here, and then use its URL link for your cat image!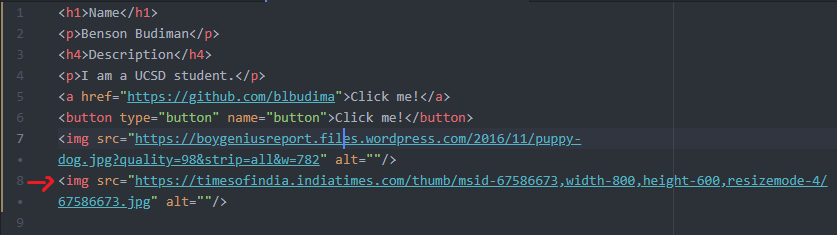
- Let’s put two line breaks between the paragraph element of your name and the heading element of “Description”.
- Let’s put the final three line breaks - one line break between the anchor element and the button element, one line break between the button element and the image element of a dog, and one line break between the image element of a dog and the image element of a cat.
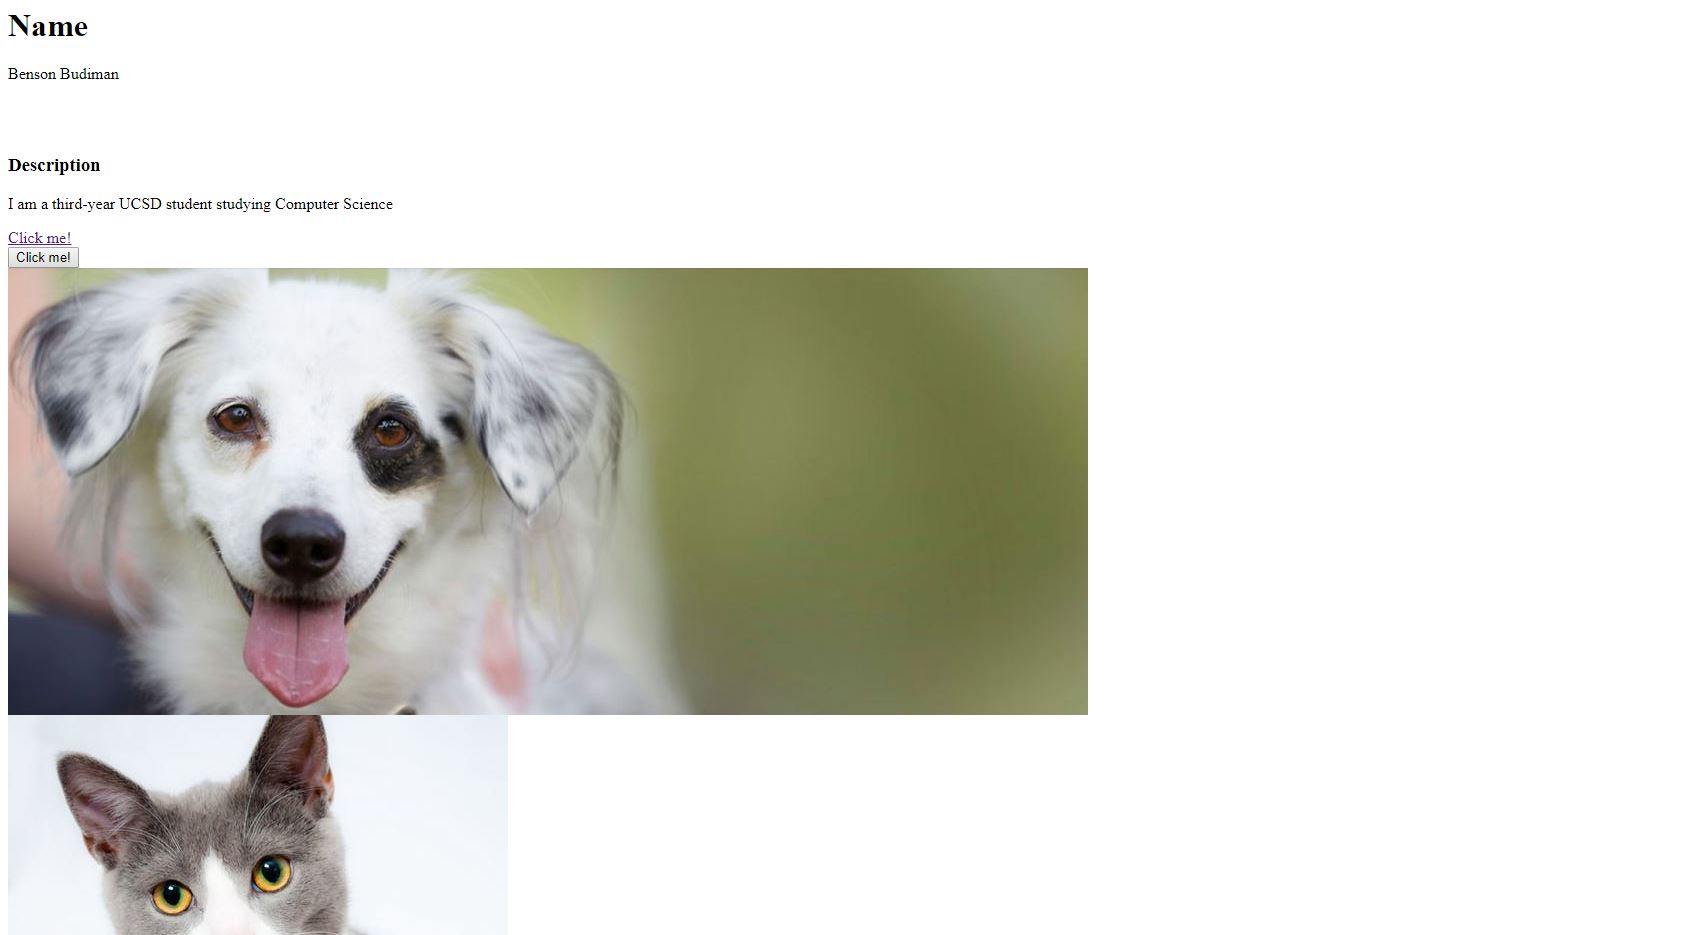
Here is an example of a small website that includes these added HTML elements:
Slightly more complex Elements
- <ul> … </ul> and <ol> … </ol>
These are HTML list elements.ulcreates an unordered list whileolcreates an ordered list.
liwhich stands for “list item”, is used to add items to the lists.
Ex:
<ol>
<li> This </li>
<li> is </li>
<li> an </li>
<li> ordered </li>
<li> list. </li>
</ol>
Output:
1) This
2) is
3) an
4) ordered
5) list.
- <table> … </table>
As the name suggests, this element is used to create table elements.
Ex:
<table>
<tr>
<th> Table Heading1 </th>
<th> Table Heading2 </th>
</tr>
<tr>
<td> Table Data1 </td>
<td> Table Data2 </td>
</tr>
<tr>
<td> Table Data1 </td>
<td> Table Data2 </td>
</tr>
</table>
Output:

SO MANY TAGS!! Let’s examine them one by one:
trstands for table row, this is used to add a row to the table, this element contains all the data in each row.thstands for table heading, this is used in the first row of each table for the heading, the content is bold by default.tdstands for table data, this is used to add data in the table.
How to set up a proper HTML file
Professional HTML files have much more than just a body element containing the different HTML elements. They have an element hierarchy and most important of all they contain metadata (data about data) that tells the browser how to display your web page.
Hierarchy
-
<!DOCTYPE html>: this is the first line of code inside a HTML file, it tells the browser that the file should be interpreted as a HTML file. -
The
htmlelement is the great-great-great-…-grandparent of all HTML elements and it’s the outermost element in a HTML file. This is used to tell the browser that the contents inside the tags are proper HTML elements. -
The
headelement contains the metadata we mentioned before. Anything inside theheadtag will not be displayed on the web page. This tag should be inside thehtmltag and outside thebodytag. -
The
bodyelement contains all the other elements that you want to display on the web page. This tag should be inside thehtmltag and outside theheadtag.
Ex:

Metadata
The following HTML metadata elements should be declared inside the head element.
- The
titleelement defines the title of the document and also the title displayed on the browser tab. - The
styleelement defines style information for the HTML page. More on this in the CSS lesson. - The
linkelement is used to link to external CSS style sheets. More on this in the CSS lesson. - The
metaelement is used to specify author, description, and other metadata. - The
scriptelement is used to define client-side JavaScript. Ex:

CHALLENGE #03: The finishing touch!
Here is the final challenge. Go ahead and edit your index.html file so that you insert these items to the bottom of what you currently have:
- Add the proper metadata to your
index.html - Add an unordered list of your favorite food(s)
- Add a table with columns for your friend and their GitHub username
Here are some hints to remember:
index.htmlcan be located on your computer in yourDocuments/GitHub/[username].github.io/folder.- Once you make your changes, don’t forget to SAVE your
index.htmlfile. This can be done by clickingFile->Saveor by pressingCTRL + Sfor Windows orCommand + Sfor Mac at the same time. - In order to check your changes, open up your GitHub Desktop (the app with the purple background), click
Commit to masteron the bottom-left, then clickPush originon the top bar. Afterwards, open up a web browser and put in your website (e.g[username].github.io) in the URL, and it should load! - Don’t forget to use Google to your advantage!
Here are some steps to get you started:
- Let’s first add the proper metadata to your
index.html. Using the image below, you will want to copy the lines where there are red arrows. The lines without red arrows should be already written from the challenges above, and so those lines should be placed within a<body>tag. Make sure your code looks similar in formatting to the image below: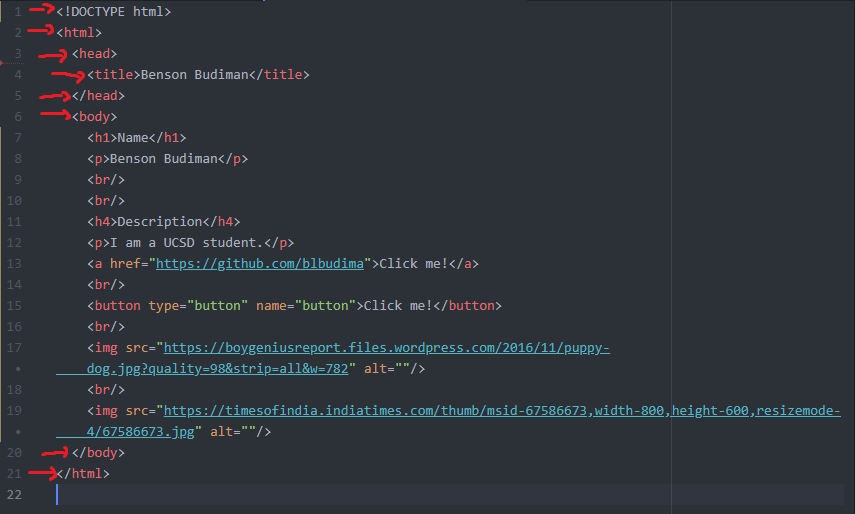
- Next, let’s begin to make our unordered list of favorite foods. We will start by adding the
<ul>tags to ourindex.html.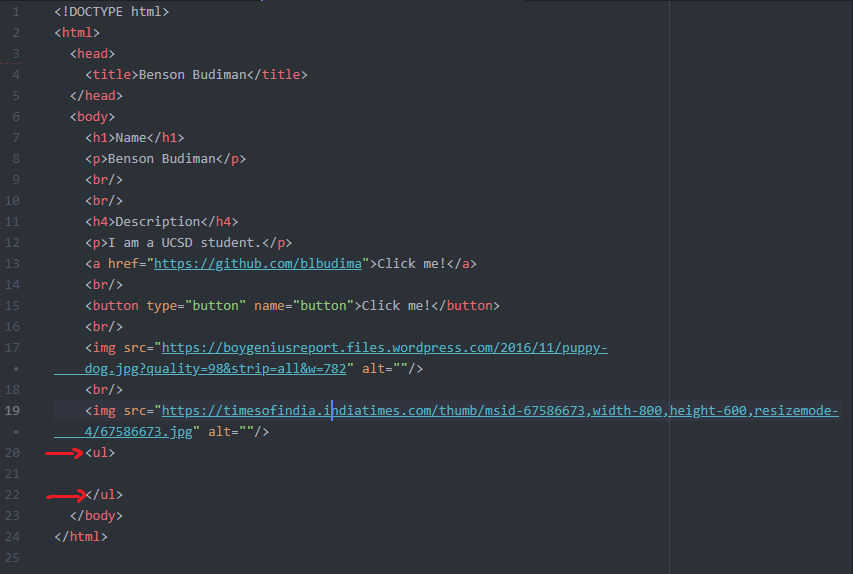
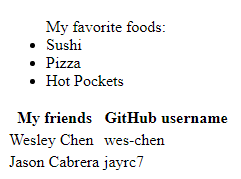
- My favorite foods are sushi, pizza, and Hot Pockets. I will add my favorite foods as a list item using
<li>. You should add your own favorite foods - add as many (or as little) as you would like!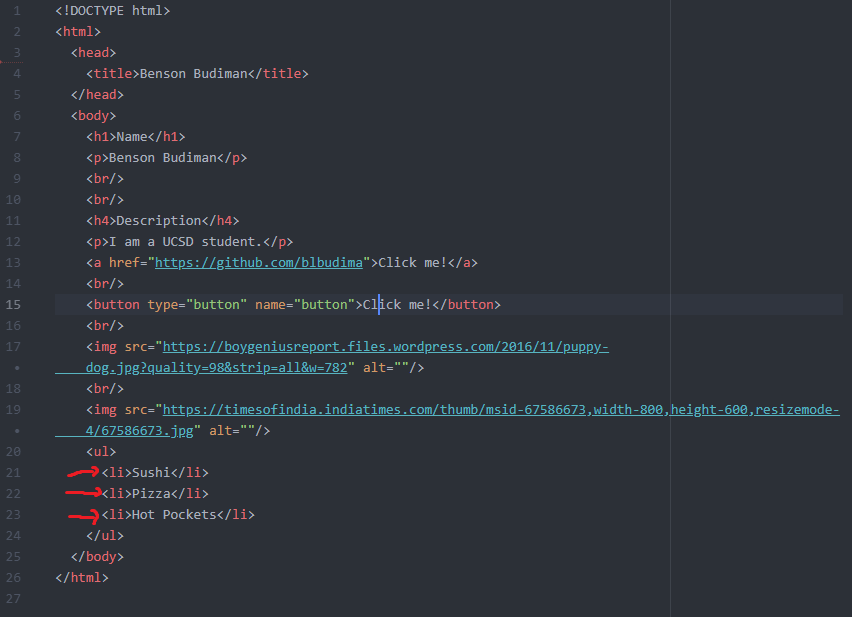
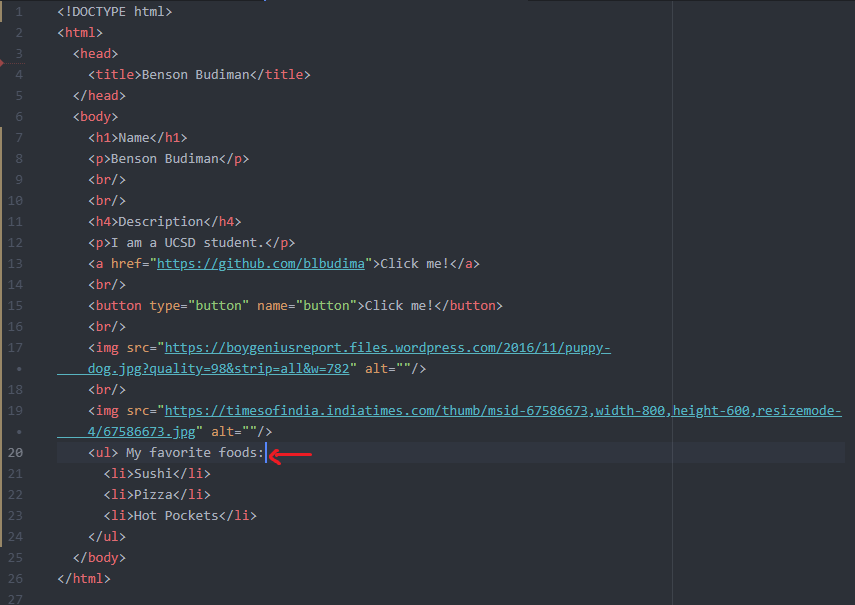
- Don’t forget to say that this is your list of favorite foods!
- Let’s start making a table of my friends and their GitHub username! Let’s first create a
<table>. Then, place a<tr>(table row) inside the<table>and insert two<th>(table headers) -My friends, andGitHub username.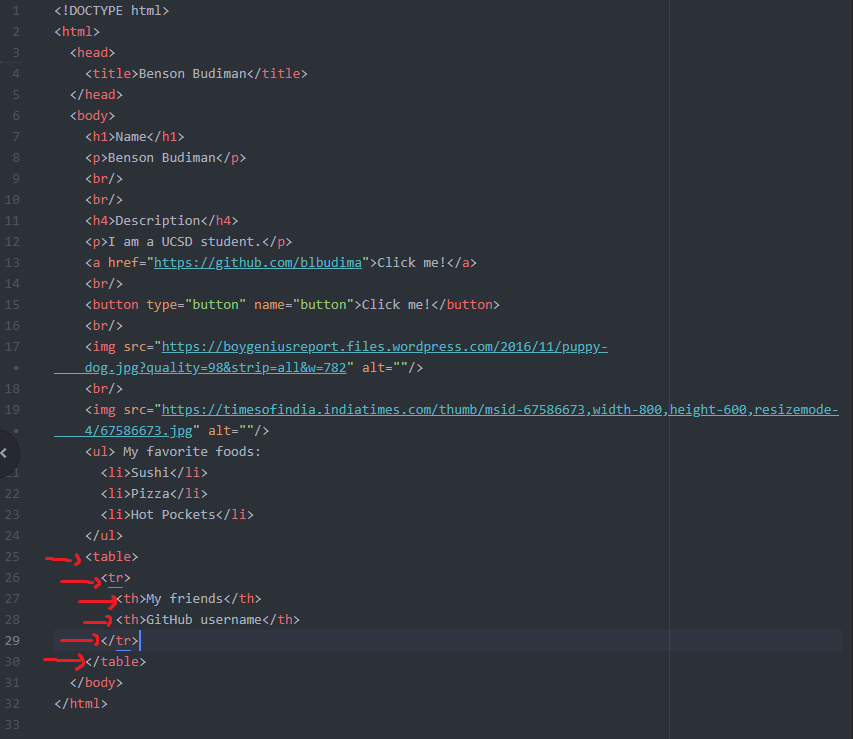
- Ask some of your friends (or the people next to you) for their name and their GitHub username! Let’s say I have
Wesley Chenas my friend, and his GitHub username iswes-chen, and I have another friend namedJason Cabrerawith his GitHub username beingjayrc7. ForWesley Chen, I would add another<tr>(table row), then place two<td>for his name and his GitHub username. Likewise, I would do the same forJason Cabrera. Feel free to add as many friends as you would like!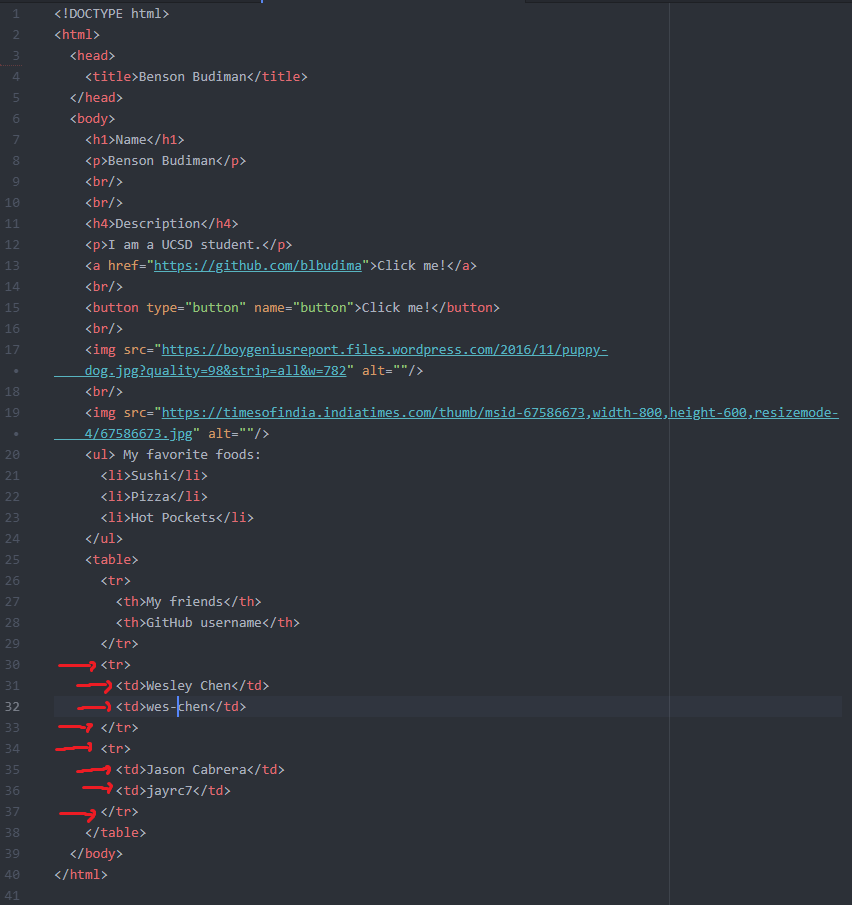
Here is an example of what that includes these added HTML elements look like:
Final Remarks
Here is an example of more things you could put on your website!
Codecademy does a pretty good job of teaching HTML. Run through this HTML tutorial to learn more.
Next Lesson
For next lesson, we learn about CSS, a styling language used to help our HTML look better. If you would like to get ahead, then please run through this Codecademy tutorial at your own pace before the next lesson.