GitHub Desktop, GitHub Pages
You have already learned that GitHub is the largest code host on the planet with over 11.9 million repositories. Furthermore, you have learned that Git is a distributed revision control and source code management (SCM) system with an emphasis on speed.
Gaining an firm understanding of Git and GitHub features opens to developers a new and liberating approach to source code management. The surest path for you to master Git is to immerse yourself in its utilities and operations and to experience it first-hand.
What are we doing today?
- GitHub Desktop
- GitHub Pages
- Task for this lesson: Make your very first website!
GitHub Desktop
Common Git commands
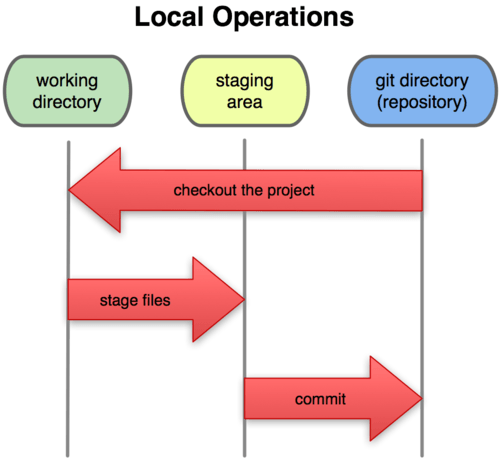
To use the functions of Git and GitHub, we would normally need to use the terminal to utilize a command line interface (CLI) on our computers to save our code in the cloud. Here is what it looks like:
Initializing a repository:
git init
Cloning a repository:
git clone https://github.com/tritonse/build-a-website.git
Pulling the most recent changes from your repository:
git pull
Committing some changes in your local machine:
git commit
Pushing your changes to the cloud (GitHub):
git push origin [branch-name]
Fear not - GitHub Desktop to the rescue!
Many of you may be unfamiliar with what a command line interface (CLI) is. Fortunately, you do NOT have to learn this terminal bogus until you get to college where courses require you to use a CLI.
Alternative to using a terminal and CLI is to use GitHub Desktop.
GitHub Desktop makes it easy for us to do all of these Git operations with the click of a few buttons!
Let’s try to pull our repository from last lesson, edit some files, commit our changes, then push it back to GitHub!
If you do not remember the contents of last lesson, no worries! Here is the last lesson. Please create a GitHub account or log in to your GitHub account and follow this guide to make your own repository!
- Sign in to GitHub Desktop
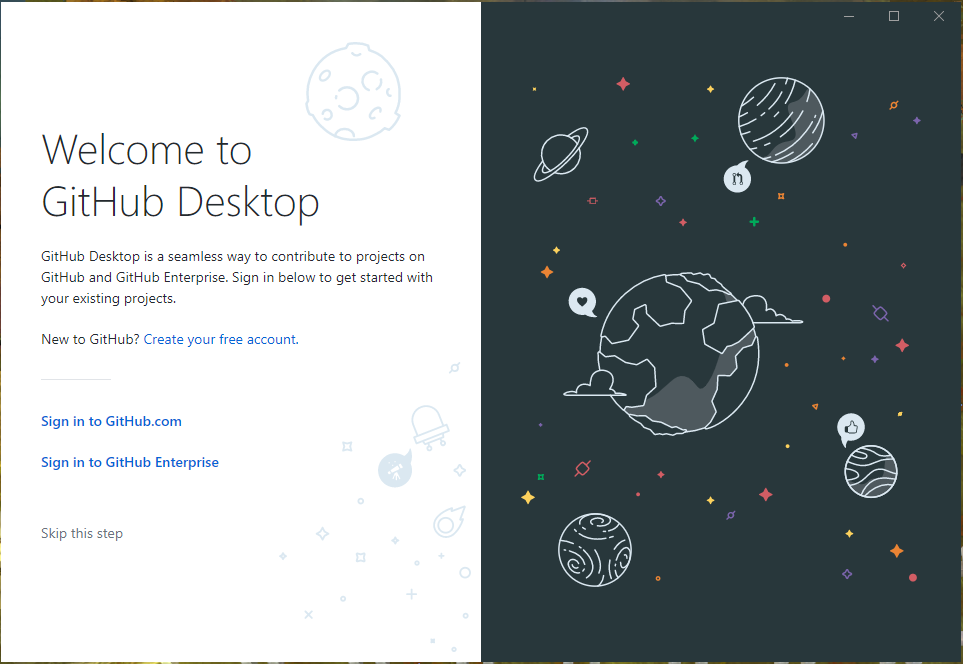
Sign into GitHub Desktop with your user credentials.
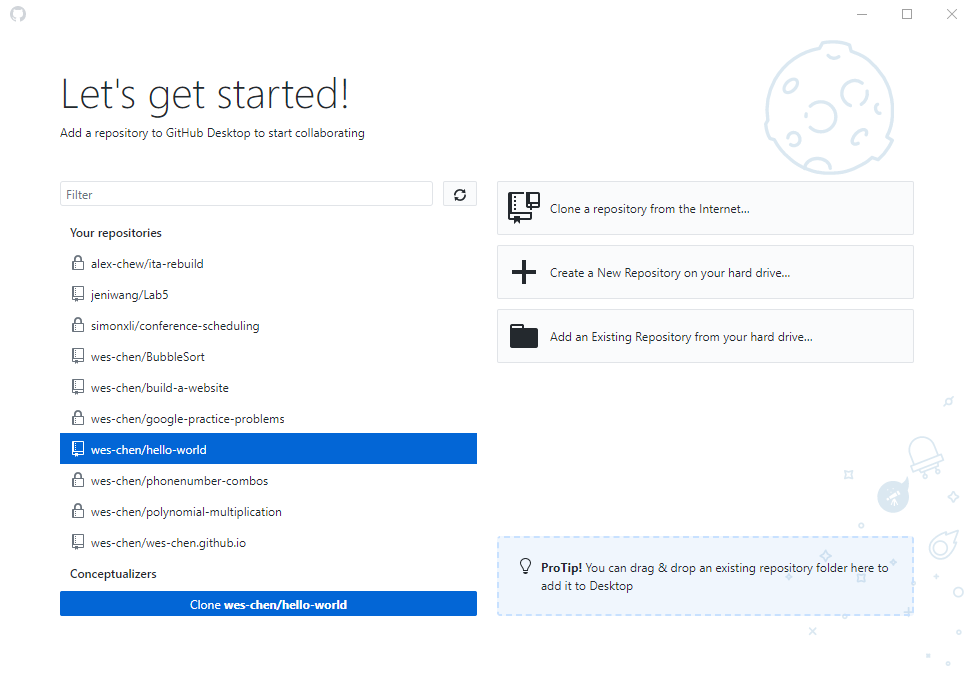
- Clone your repository from the cloud.
Select a repository to clone from GitHub. In this case, it should be your hello-world repository that you made last lesson.
Clone your repository into your local machine wherever you want to store your files. Make sure it is at a location where you can easily find it!
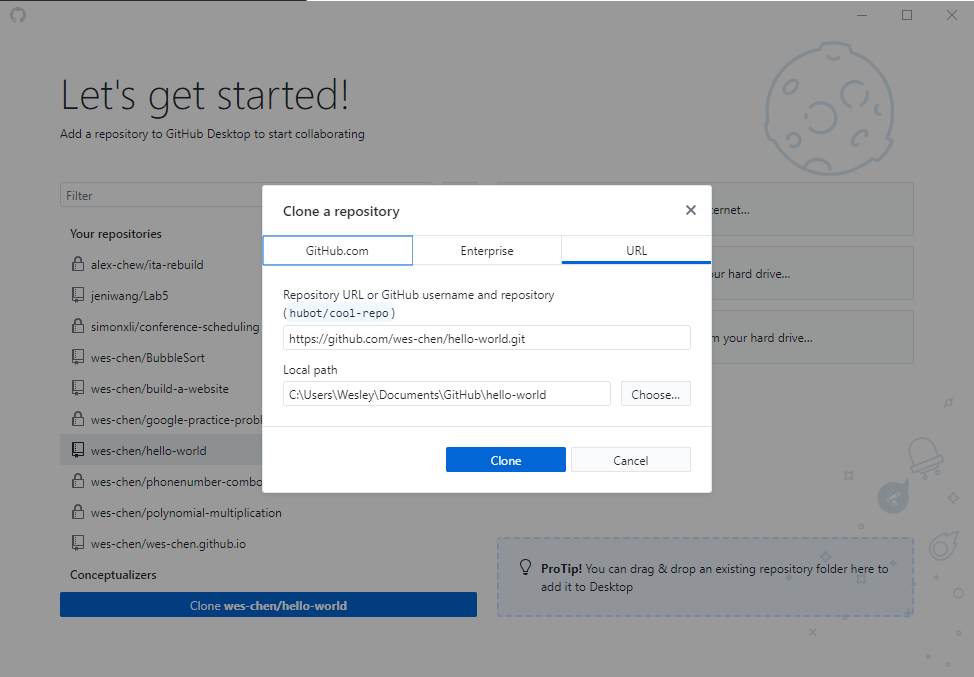
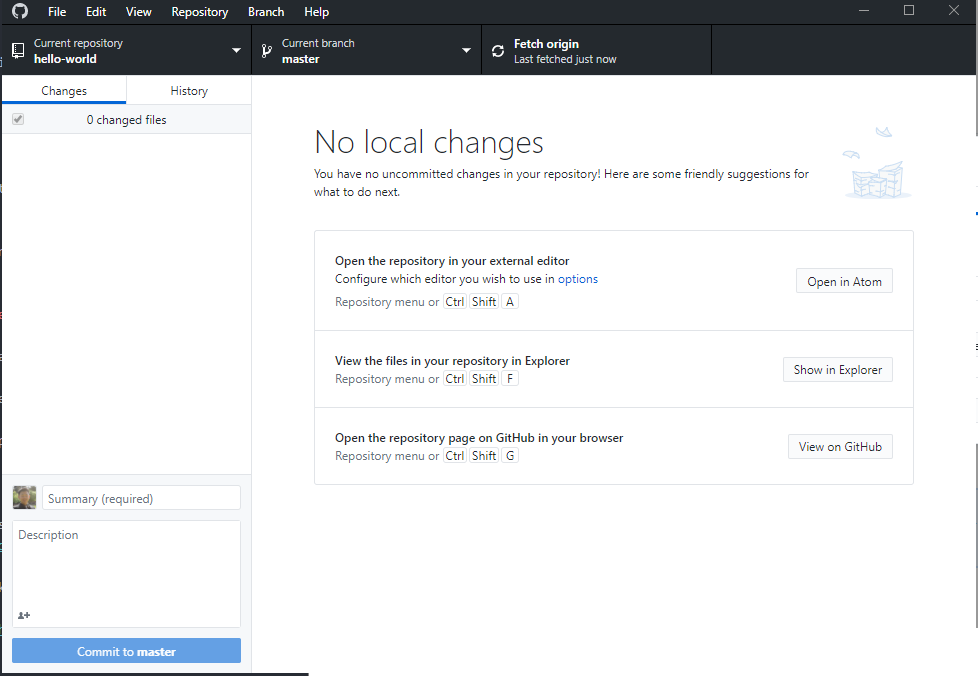
Congratulations! You have successfully cloned your repository from the cloud. If you navigate to the folder to where you cloned the repository, then you should be able to find a README.md file!
- Make a few edits!
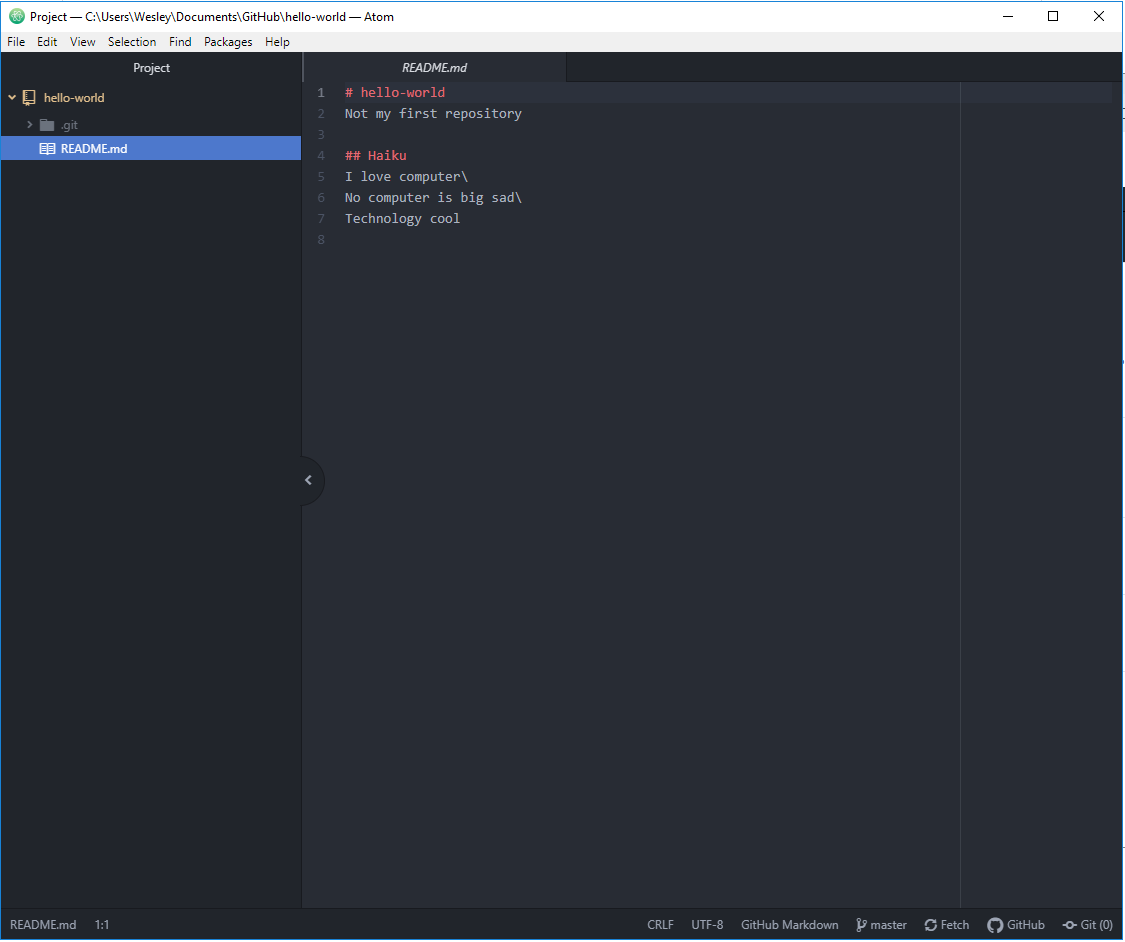 This is a screenshot of what I originally had in my README.md file. You can open your README.md file using any text editor, but our text editor of choice is Atom.
 Here, I have edited the contents of my README.md file! Feel free to make any changes you would like to your README.md file, and then press CTRL + S (on Windows) or CMD + S (on Mac) to save your changes to the README.md file. Suggestions for changes include: your name, your GitHub username, or a list of your hobbies. To learn about how to create different size fonts that will appear on GitHub later, check out this short guide for more information!
- Commit your changes to your local Git repository.
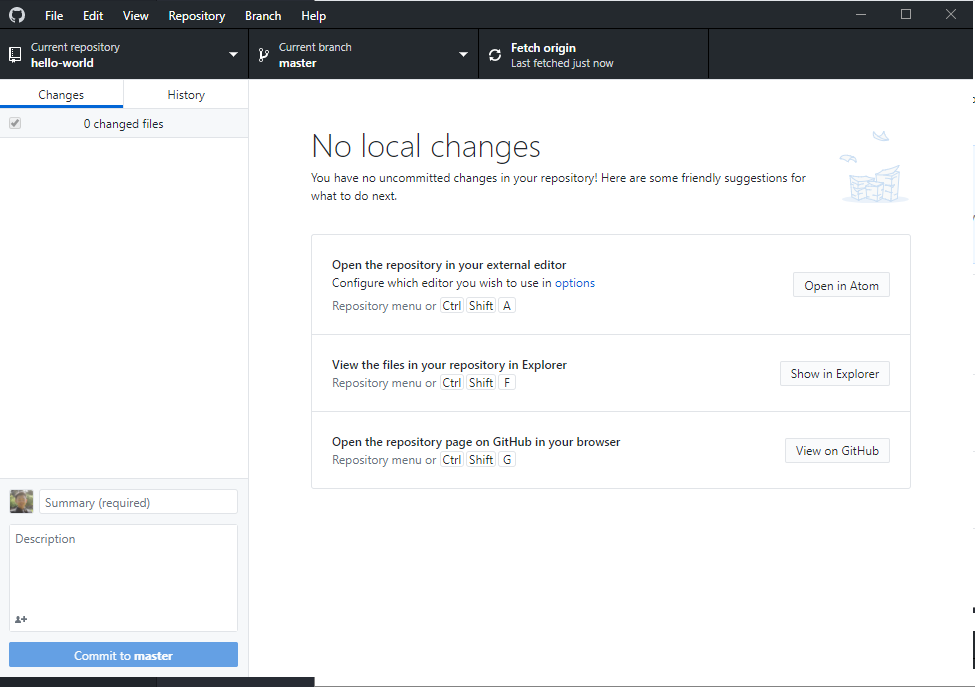
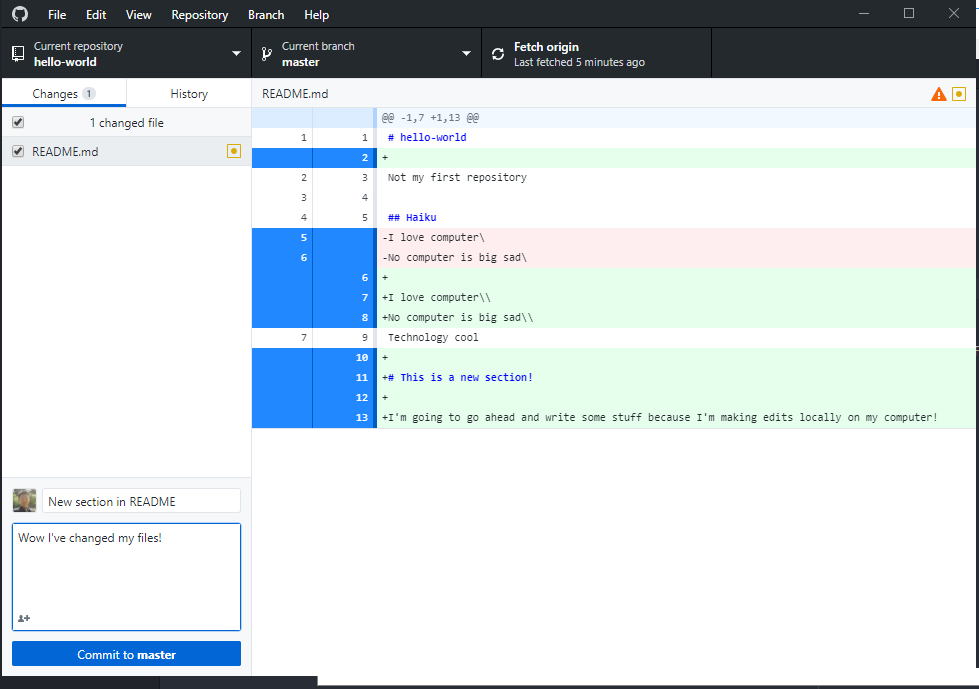 If we check GitHub Desktop, then we should see either red or green highlights on the right indicating which lines of the README.md file have been altered. You should be able to commit these changes to your local repository on the master branch! Remember to write a meaningful commit message so you know why you made this change!
- Push your changes to the repository.
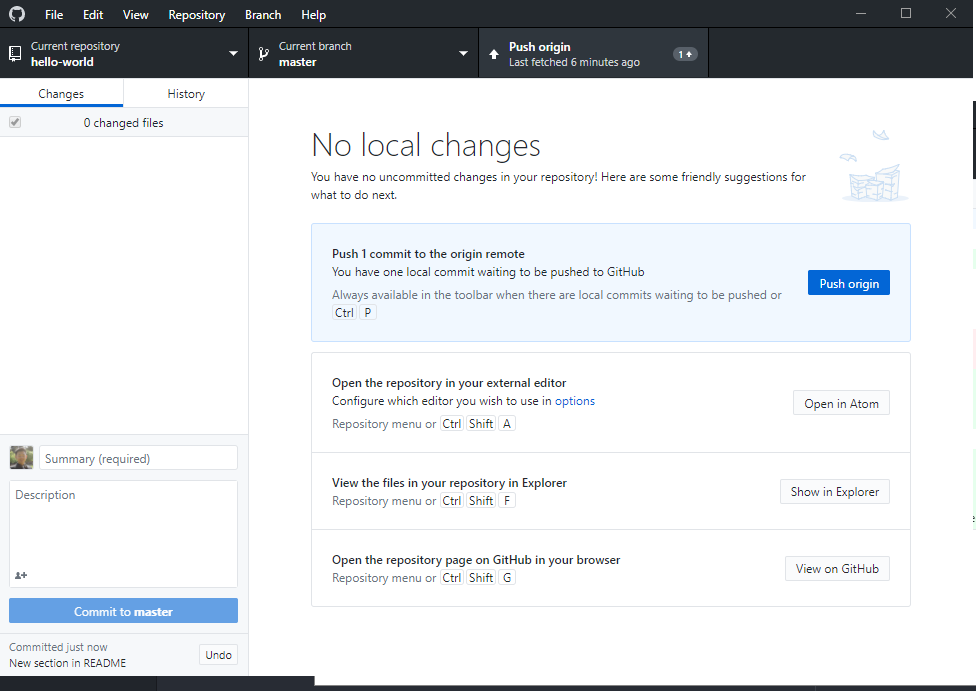 Now that I have committed something to my local repository, I am ready to push my local changes to my online GitHub repository! Click the “Push origin” button near the top of the GitHub Desktop interface.
 I have pushed my local changes to GitHub!
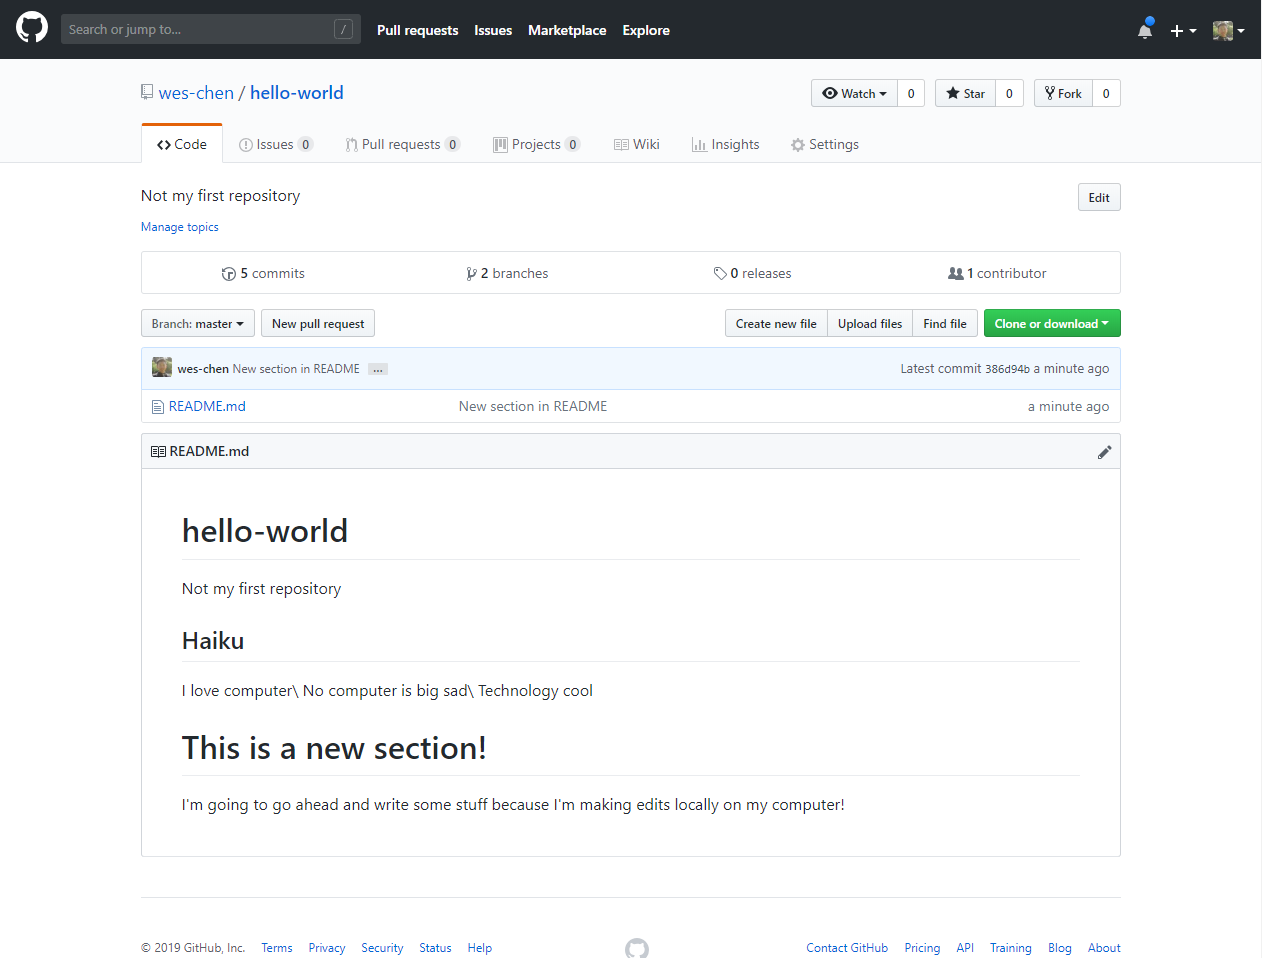 If I check my GitHub account, I can see my new changes reflected online on GitHub. If you are unable to find your repository, clicking on your profile should give you a list of your own repositories.
GitHub Pages
GitHub has a really awesome feature where you can host your own website FOR FREE! All you need to do is create a repository named [your username here].github.io and it’ll automatically host your website at [your username].github.io. It is pretty nifty, and it doesn’t cost a dime!
This tutorial runs through the basic workflow of using GitHub Pages. However, instead of the terminal nonsense, follow these steps:
- Make a new repository on GitHub.
- For repository name, enter:
username.github.io( Ex: if your username isdanHuangthen your repo name would bedanhuang.github.io). - Make the repository public.
- Check
Initialize the repository with a README. - Click
Create Repository. ( If the button is grayed out please make sure the form has been filled out. )
| GitHub Desktop Workflow | Alternative Workflow |
| 6. Open GitHub Desktop and clone the repository. | 6. In the repository, click Create new file. |
| 7. In any text editor, type "Hello World!". | 7. In the file editor, type "Hello World!". |
| 8. Save the file as "index.html" inside the repository folder. | 8. Name the file as "index.html". |
| 9. On GitHub Desktop commit the changes and push them to the online repository. | 9. Click Commit new file. |
-
Go to https://[your-username].github.io to see your website! (Make sure to use your own username in the link) Here is an example of what you should expect to see.
-
Congratuluations! You are now hosting your mini website on GitHub Pages! If you would like to add text to your website, then you can edit index.html in anyway you like, commit those changes to your local repository, then push those local changes to the online [username].github.io repository. You will be able to see your changes if you follow those steps correctly!
Note: If you want to go through the tutorial yourself, here are the steps after opening the Thinkful link:
- At Step 1: Click
Starting from scratch. - At Step 2: Click
User Pages.
CHALLENGE 01:
Knowing that you can use GitHub Pages to host your own website, your challenge is to make some simple changes to your single-paged website.
The challenge for this lesson will be the simplest out of all of the challenges from all of the lessons.
CHALLENGE: Remove the “Hello World!” text from the webpage and replace it with four separate lines: 1. Your full name 2. Your GitHub username 3. Your favorite food(s) 4. Your hobbies
To make sure your changes worked, always check your GitHub Pages website at [your username].github.io.
Next Lesson
Next lesson, we learn about the essentials of HTML. HTML provides a skeleton for your webpage so that it will start to have a structure to it. If you are looking to get ahead, please run through this CodeAcademy tutorial at your own pace before the next lesson.